To make a Starbucks style chocolate cake pop, mix cake crumbs with frosting, shape into balls, and dip in melted chocolate. The process is simple and mirrors that of Starbucks’ popular treat.
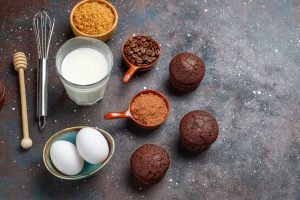
Chocolate cake pops have become a ubiquitous treat, especially known from the Starbucks menu. This at-home recipe captures the essence of their indulgent chocolate flavor and the quintessential moist, cakey texture coated in a crisp chocolate shell. These delightful treats are perfect for parties, as a special snack, or even as a creative gift for friends and family.
Ensuring the bites are uniform in size not only makes them aesthetically pleasing but also offers a consistent flavor experience with each bite. By following the recipe closely, bakers of all levels can create these Instagram-worthy confections right in their own kitchen.
The Allure Of Starbucks Chocolate Cake Pops
Imagine a perfect bite of bliss, a harmonious balance of chocolatey goodness and moist cake—this is the experience Starbucks captures with their iconic Chocolate Cake Pops. These small yet indulgent treats conjure up pure delight in a single mouthful, forging a connection between the joy of dessert and the comfort of coffee culture.

A Sweet Treat Icon
Starbucks’ Chocolate Cake Pops have become a synonym for indulgence. From their glistening chocolate shell to the tender cake inside, these pops are a celebration of flavor. Each one is crafted with care and finesse, resulting in a treat that’s not only delicious but also visually appealing.
The Popularity Of Starbucks’ Confections
It’s no mystery why the Chocolate Cake Pop is a fan favorite. Starbucks understands the art of confectionery. Their cake pops are the perfect companion to any of their handcrafted beverages, making them a top pick for customers seeking a little sweetness to go with their coffee break.
- Compact and convenient for on-the-go enjoyment
- Fixed portion size for controlled indulgence
- A variety of flavors to entice any palate
Key Ingredients For Homemade Magic
Creating the perfect Chocolate Cake Pop akin to Starbucks’ famous treat starts with understanding the base ingredients. The delight in every bite stems from a meticulous selection of components. It’s not just about taste; it’s about texture and quality, too. Let’s explore the essential ingredients that make homemade cake pops an absolute delight.
Essential Components For The Base
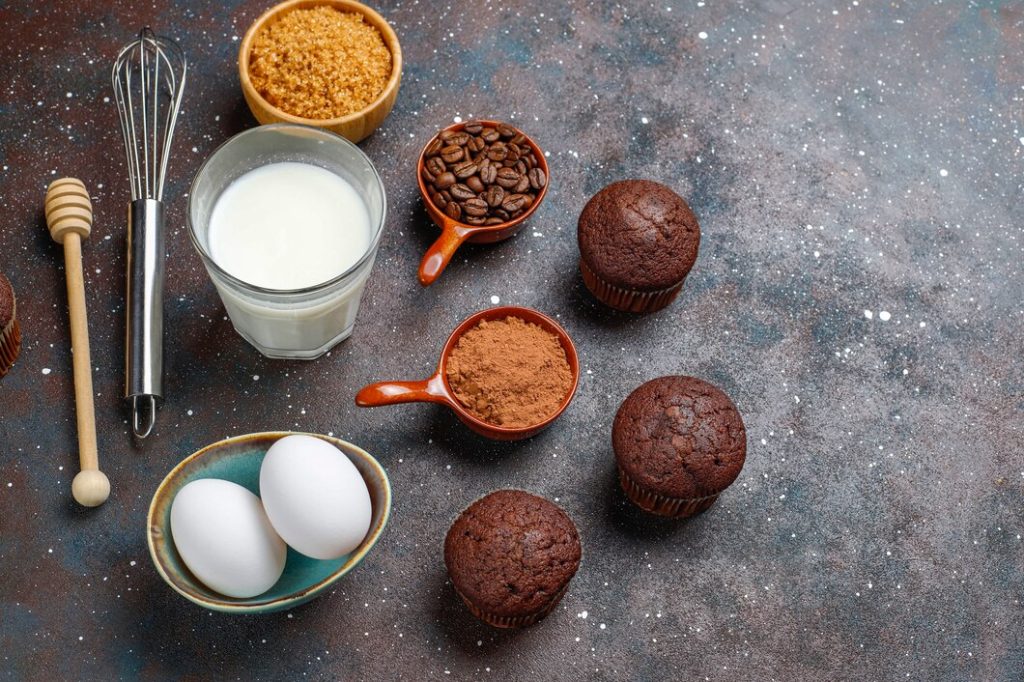
The foundation of any delicious cake pop is the cake base. It should be moist, fluffy, and rich in flavor. Crafting this crucial part requires:
- All-purpose flour for a smooth and firm texture.
- Sugar to add the right amount of sweetness.
- Cocoa powder, preferably unsweetened, for that deep chocolate essence.
- Baking powder to ensure your cake rises just right.
- Eggs, the binding agent that brings it all together.
- Butter or oil for that irresistible moistness.
- Milk to blend the ingredients into a smooth batter.
- Vanilla extract for a hint of aromatic excellence.
Choosing The Right Chocolate
The chocolate coating is more than just a topping; it’s the soul of your cake pop. Selecting the ideal chocolate ensures a glossy finish and perfect snap. Opt for:
| Type of Chocolate | Reason to Choose |
|---|---|
| Couverture Chocolate | High-quality with more cocoa butter, melts evenly and creates a professional sheen. |
| Dark Chocolate | Offers a rich, intense flavor and balances the sweetness of the cake. |
| Milk Chocolate | A milder, creamier option for those who prefer a softer chocolate taste. |
| White Chocolate | Brings a velvety sweetness and can be colored for a fun twist. |
Each chocolate type imparts a unique character to the cake pops. Experiment to find your favorite or combine different types for a custom blend. Remember to melt your chocolate gently, using a double boiler or microwave, to avoid burning it. Patience here ensures a flawless chocolate shell.
Creating The Perfect Cake Base
A delightful Starbucks Chocolate Cake Pop begins with the perfect cake base. A moist and rich foundation is the secret behind that irresistibly luscious bite. Whether you’re a baking beginner or a seasoned pro, follow these steps to ensure your cake pops are a hit every time.
Mixing The Batter
Starting with quality ingredients is crucial for the best flavor. Lay out all your materials before beginning to mix. Here’s a simple guide:
- Combine your dry ingredients, like flour, cocoa powder, and baking soda
- Next, mix in the sugar and a pinch of salt for balance
- Add the eggs, one at a time, ensuring they’re fully incorporated
- Finally, blend in milk and vanilla extract for depth of flavor
Use a mixer to ensure the batter is smooth and free of lumps. Aim for a consistency that’s thick, yet pourable.
Baking Techniques And Tips
Choosing the right pan is important. A square baking dish works best for cake pops. Here’s how to bake your cake to perfection:
| Step | Tip |
|---|---|
| Preheat your oven | Set it to 350°F (175°C) for an even bake |
| Grease your pan | Use butter or non-stick spray to prevent sticking |
| Pour batter evenly | Smooth out with a spatula to remove air pockets |
| Bake until done | Insert a toothpick into the center; it should come out clean |
| Cool completely | Let it sit before crumbling for pops |
Don’t rush the cooling process. A cake that’s too warm can lead to soggy pops. Once your cake is cool, you’ll crumble it finely—this ensures even distribution when mixed with frosting for your cake pops.
Assembling The Cake Pops
Creating your Starbucks-inspired chocolate cake pops at home is a fun process. Now that you’ve baked your decadent chocolate cake and have let it cool, it’s time to roll up your sleeves and begin the assembling of your cake pops. This step transforms your chocolate cake into those irresistible bites of heaven. Let’s dive into the key phases: from crumbling your cake to shaping the pops, to using frosting as a tasty binder.

Crumbling And Shaping
The foundation of a perfect cake pop is its texture. Begin by crumbling the cake into fine pieces. You can use either your hands or a food processor for this job — the goal is to have a bowl of fluffy cake crumbs.
Once you have your crumbs, it’s time to shape them. Scoop a portion and roll it between your palms to create a smooth and even ball. Aim for a size similar to a golf ball. It’s important to press firmly enough for the crumbs to stick together but gently so as not to compact them too much. After all, we want our cake pops to have that deliciously soft texture.
The Role Of Frosting For Binding
Frosting isn’t just for flavor; it’s the glue that holds your cake pops together. Add a dollop of your favorite chocolate frosting to the crumbs. Make sure not to overdo it — you need just enough to bind the cake together. Too much frosting can make your pops too moist and dense.
Mix everything until the cake pieces are uniformly coated with frosting. The mixture should be moldable but not slippery. Now, take a little mix, press it between your hands, and create another perfect round shape. Repeat this process until you have used all your mixture.
Insert the lollipop sticks into each cake ball, and there you have it — your cake pops are now ready for the final touches!
Dipping And Decorating Like A Pro
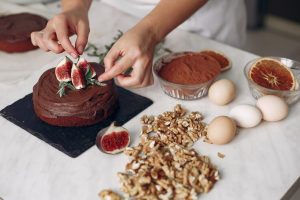
The magic of a Chocolate Cake Pop from Starbucks lies not just in its rich, moist center, but also in its impeccably decorated exterior. Achieving that professional look at home is easier than you think. With the right techniques for melting chocolate and applying sprinkles and toppings, you can create delectable cake pops that rival those of your favorite coffeehouse.
Melting Chocolate To Perfection
Smooth, glossy chocolate forms the perfect shell for any cake pop. To get that Starbucks shine, follow these tips:
- Select high-quality chocolate chips or bars; it makes a difference.
- Chop bars into small, even pieces for uniform melting.
- Use a double boiler or microwave in short bursts to avoid burning.
- Stir continuously until the texture becomes luscious and dip-ready.
Adorning With Sprinkles And Toppings
After dipping, it’s time for the fun part – decoration! To recreate that Starbucks sparkle, grab your sprinkles and toppings and:
- Dip the freshly coated cake pop into a bowl of sprinkles.
- Gently roll for an even coat or sprinkle by hand for a design.
- Add a range of toppings, like crushed nuts or candy pieces, for texture.
- Place them onto a stand to set, ensuring the coating stays flawless.
Tip: Work fast while chocolate is still tacky to make sure each piece sticks!
Setting And Serving Your Creations
Embark on the final journey of crafting the perfect Chocolate Cake Pop alá Starbucks. After mastering the recipe, the setting and serving add the wow factor to your homemade delights. Proper cooling methods guarantee a sturdy bite, while imaginative presentation ideas set the stage for a memorable treat experience.
Proper Cooling Methods
Cooling cake pops correctly is critical to their texture and stability. Follow these steps:
- Chill the cake pops for at least two hours before dipping.
- After dipping, stick them upright in a Styrofoam block.
- Let them rest until the coating hardens, securing the cake inside.
This simple yet effective process will keep your cake pops in perfect shape.
Presentation Ideas
Presenting your cake pops with flair makes all the difference. Here’s how to display them:
- Arrange on a fancy platter with colorful garnishes.
- Wrap individually for a personal touch.
- Stack in a clear jar for an eye-catching centerpiece.
Use ribbons, sprinkles, and creative stands to highlight your treat’s beauty. They are not just tasty, they’re a feast for the eyes as well!
Troubleshooting Common Cake Pop Issues
Crafting the perfect Chocolate Cake Pop like Starbucks requires finesse and troubleshooting. Not every batch turns out flawless. But don’t worry! With a few tips, you can overcome the pesky problems that pop up. From preventing cracks to mastering a silky chocolate coating, we’ve got the fixes for common cake pop blunders!
Avoiding Cracks And Leaks
Cracks and leaks can ruin your cake pops’ appearance. They occur when the inside expands but the coating doesn’t. To prevent this:
- Let the cake balls rest before dipping. This balances their temperature.
- Dip the cake pop stick into the chocolate first. Then insert it into the ball.
- Don’t freeze the balls for too long. Chill them just until they’re firm.
These steps keep cake balls from cracking. Now, they are ready for a smooth chocolate bath!
Ensuring Smooth Chocolate Coating
A smooth chocolate coat makes the cake pops irresistible. Here’s how to get it right:
- Melt chocolate properly. Use a double boiler or microwave in short bursts.
- Add oil if chocolate is too thick. This will thin it out for easier coating.
- Tap off excess chocolate. Hold the pop over the bowl and tap gently.
Smooth coating requires patience. Take it slow and your cake pops will shine!
Alternative Variations And Flavors
Creativity shines bright in the kitchen, especially when you play around with the beloved Starbucks Chocolate Cake Pop recipe. With a pinch of curiosity and a sprinkle of imagination, you can craft a variety of cake pops that stand out on any dessert table. Read on to discover how simple swaps and seasonal flourishes can transform this classic treat.
Experimenting With Cake Mixes
Every cake flavor holds the promise of a new cake pop experience. Chocolate cake mix is just the beginning. Here’s a rundown of cake mixes to whip up some magic:
- Vanilla or Yellow Cake Mix: Perfect for a classic, subtle flavor.
- Red Velvet: Add a vibrant twist with a southern favorite.
- Funfetti: Who doesn’t love a pop of color in their dessert?
- Spice Cake: Introduce a warm, cozy feel to your cake pops.
- Lemon: Offer a zesty, refreshing alternative.
Incorporating Seasonal Twists
Embrace the seasons through festive flavors and decorations. Tailor your cake pops to the time of year for a treat that truly resonates.
- Spring: Use lemon cake mix with pastel-colored coatings.
- Summer: Mix in tropical flavors like coconut or pineapple.
- Fall: Pumpkin spice cake pops dipped in dark chocolate.
- Winter: Eggnog flavor with a nutmeg dusting.
Let each season guide the way to a uniquely delightful cake pop creation. Remember, the best part is seeing friends and family light up with every new variation of your chocolate cake pop masterpiece.
Storing And Keeping Your Cake Pops Fresh
Knowing how to store your Chocolate Cake Pops from Starbucks ensures that every bite remains as delicious as the first. Whether planning for a party or saving some for later, proper storage keeps your treats fresh.
Short-term Serving Suggestions
Ready to serve Chocolate Cake Pops at an event or to guests visiting soon? The key is to maintain the perfect balance of moisture and sweetness just right until serving time.
- Avoid direct sunlight: Keep cake pops in a cool, dark place.
- Room temperature: Best for up to a day. Ensure they’re covered to prevent drying.
- Use a cake pop stand: This tool displays your treats and keeps them upright.
Long-term Storage Solutions
Won’t be serving your Chocolate Cake Pops right away? The right strategies will preserve your sweets for longer enjoyment.
- Refrigeration: Pops stay fresh for a week when refrigerated. Place them in an airtight container first.
- Freezing: For a month or more of storage, wrap pops individually in plastic wrap then foil before placing in a freezer bag or airtight container. Thaw in the refrigerator before serving.
Taking Your Cake Pops To The Next Level
Craving that perfect Starbucks Chocolate Cake Pop? Why not create magic right at home! Let’s transform your kitchen into a boutique bakery. Sprinkles, chocolates, and frosting – the adventure awaits. Your taste buds will dance with joy!
Advanced Decorating Techniques
Beyond the basics, let’s explore advanced methods. Mastering these skills will ensure each cake pop is a mini masterpiece.
- Marbling Magic: Swirl two colors of candy melts. Dip your cake pop for a stunning effect.
- Splendid Sprinkles: Play with sizes and colors. Add them before the coating sets.
- Glitzy Glitters: Edible glitter makes your pops dazzle. Use a brush for a delicate shine.
These touches invite oohs and aahs. Become a cake pop artist with these secrets.
Crafting Professional-quality Cake Pops At Home
Longing for bakery-level quality in every bite? Achieve this with the right tools and ingredients.
| Tool | Use |
|---|---|
| Cake Pop Stand | Keeps pops upright as they set. |
| Chocolate Melter | Ensures smooth, even coating. |
| Flavor Extracts | Adds a twist to the taste. |
Remember, patience is key. Don’t rush the chilling; respect the dipping. Smooth moves produce smooth finishes. A gentle touch brings out the beauty in every cake pop. Are you ready to show off your newfound prowess?
FAQs For Chocolate Cake Pop Starbucks Recipe
What Is A Starbucks Chocolate Cake Pop?
A Starbucks Chocolate Cake Pop is a sweet, ball-shaped chocolate cake coated in a chocolatey icing and served on a stick, resembling a lollipop. It’s a portable and perfectly portioned treat for a quick chocolate fix.
How Do I Make A Starbucks Cake Pop At Home?
To make a cake pop similar to Starbucks, mix crumbled chocolate cake with frosting, shape into balls, then dip in melted chocolate. Insert sticks and chill until the chocolate coating sets for an at-home version of this delightful snack.
What Ingredients Are In A Starbucks Cake Pop?
A typical Starbucks Cake Pop contains chocolate cake, frosting, and a chocolate coating. Some recipes might include sprinkles or additional flavorings to enhance the treat, mimicking the familiar Starbucks version.
Are Chocolate Cake Pops From Starbucks Nut-free?
Starbucks Chocolate Cake Pops are generally considered nut-free, but cross-contamination can occur. Always check with your local Starbucks or refer to their allergen information for the most accurate data.
Conclusion
Ready to indulge in the velvety delight of a homemade Chocolate Cake Pop, Starbucks-style? With this simple recipe, you can now bring the coffeehouse experience right to your kitchen. Gather your apron, and ingredients, and let’s create confection perfection. Savor every bite, share with friends, or make any moment a bit sweeter! Enjoy baking—and tasting—your new favorite treat.
Softasilk Cake Flour Recipes: Bake Like a Pro!

