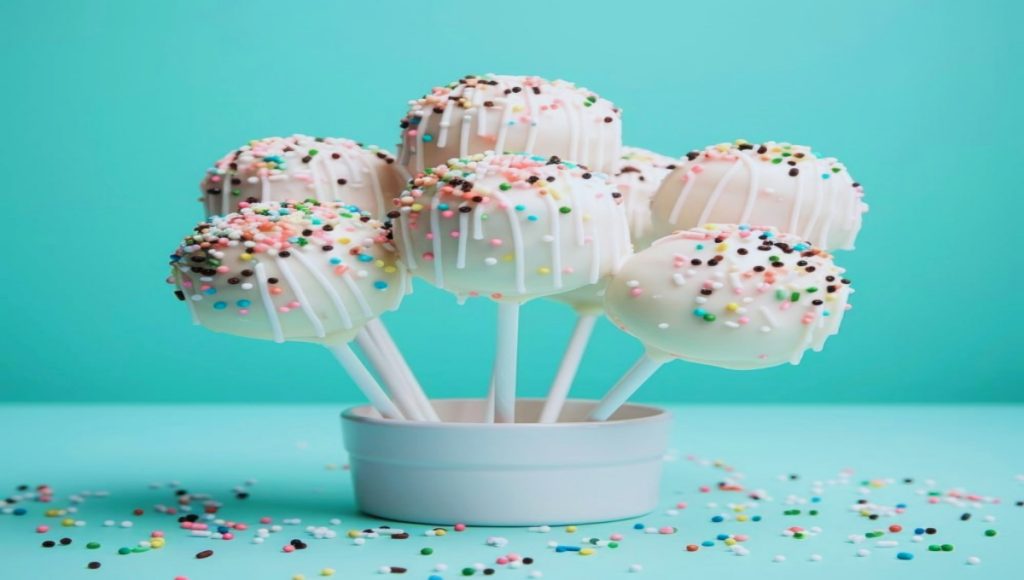
To make strawberry cake pops, blend baked strawberry cake with frosting and form into balls before dipping in melted chocolate. Decorate with sprinkles for a festive touch.
Embarking on a strawberry cake pops journey leads to an enchanting blend of sweet, rich flavors sure to delight any dessert enthusiast. Perfect for parties, these bite-sized treats combine the moistness of cake with the decadence of chocolate in a fun, portable form.
Crafting these delightful pops involves a simple process that even baking beginners can master. With a burst of strawberry essence in every bite, these cake pops offer an irresistible twist on the classic confection. Whether serving as a charming gift or as the star of a dessert table, strawberry cake pops are both visually appealing and deliciously satisfying. Dive into creating these little globes of joy and watch them disappear as quickly as you can make them!
Introduction To Strawberry Cake Pops
Bite-sized and bursting with flavor, strawberry cake pops are a delightful treat loved by all ages. These sweet creations combine the luscious taste of strawberries with the fun and convenience of a pop. Easy to make and even easier to devour, they’re perfect for any occasion, from birthday parties to afternoon snacks.
The Popularity Of Cake Pops
Cake pops have taken the dessert world by storm, thanks to their versatility and adorable presentation. Their popularity soars as party planners and home bakers alike adore these mini treats. With a wide range of flavors and decorations, cake pops are a canvas for creativity.
- Perfect for sharing
- Ideal for customization
- Suitable for all events
Why Strawberry Flavor Stands Out
The strawberry flavor shines in cake pops. The fruit’s sweet and slightly tart profile pairs well with the richness of the cake. It’s a hit among sweet tooths seeking refreshing, fruity notes in their desserts. Strawberry not only appeals to the palate but also the eye with its vibrant color.
| Strawberry Appeal | Reason |
|---|---|
| Bold Color | Visually enticing |
| Fresh Flavor | Balances sweetness |
| Popular Taste | Loved by all ages |

Gathering The Essential Ingredients
Embarking on a delicious journey to make Strawberry Cake Pops begins with the preparation of gathering the essential ingredients. This thoughtful process will ensure that you have everything at hand for a smooth and enjoyable baking experience. As the saying goes, a well-prepared baker is halfway to success.
The Strawberry Cake Base
First things first, let’s talk about the heart of the cake pop – the strawberry cake base. You will need:
- 1 box strawberry cake mix – The foundation for our cake pops
- Water, oil, and eggs – As directed on the cake mix box
- 1 teaspoon vanilla extract – To enhance the cake’s flavor
These ingredients will be mixed and baked according to the cake mix instructions, creating a moist and flavorful base for your cake pops.
Binding And Coating Ingredients
With the cake baked, we’ll need a few more items to complete our cake pop masterpiece:
| Ingredient | Function | Quantity |
|---|---|---|
| Frosting | To bind cake crumbs | 1/4 cup |
| White chocolate | For coating | 16 oz |
| Coconut oil | To thin chocolate | 1 tbsp |
| Strawberry crunch | For added texture | As needed |
| Sprinkles | For decoration | As desired |
These components will transform the cake into bite-sized pops, ready for snacking or sharing. The frosting binds the cake, the melted chocolate creates a shell, and the sprinkles add a colorful touch.
Tools Of The Trade
Welcome to the sweet and delightful world of making strawberry cake pops! Before we dive into mixing and dipping our way into these bite-sized treats, let’s talk about the Tools of the Trade. Whether you’re a seasoned baker or trying this out for fun, having the right equipment at your fingertips makes the process enjoyable and the outcome delicious. You’ll need essential kitchen gear and some specialized accessories to get started.
Essential Kitchen Equipment
Every baker needs a toolkit to whip up magic. Here’s what your kit should have:
- Mixing Bowls: For combining your ingredients.
- Electric Mixer or Whisk: To blend the cake batter and frosting into smooth perfection.
- Measuring Cups and Spoons: Precision is key for delicious cake pops.
- Baking Sheets: To bake an even cake ready for crumbling.
- Oven: It brings the batter to life.
- Cooling Rack: For a cooled cake that’s easy to crumble.
Specialized Cake Pop Accessories
With the basics covered, enhance your cake pop creation with these special tools:
| Accessory | Use |
|---|---|
| Cake Pop Maker or Mold | For perfectly shaped spheres. |
| Sticks | To hold your cake pops. |
| Styrofoam Block | To stand your pops as they set. |
| Candy Melts | For a smooth, colorful coating. |
| Microwave-Safe Bowl | To melt your candy coating. |
| Decorating Pens or Sprinkles | For added flair and fun! |
With these tools on your bench, you’re set to start creating those lovely strawberry cake pops. Follow the recipe, shape your batter, dip into the melts, decorate your heart out, and delight in each pop of strawberry sweetness!
Creating The Strawberry Cake
Let’s embark on a delightful journey to make the heart of our Strawberry Cake Pops – the strawberry cake. Crafting this sweet foundation offers a burst of berry flavor in every bite. A perfectly baked strawberry cake ensures our cake pops are irresistible from the very core.
Mixing The Batter
The secret to a great cake starts with the batter. To create a perfect strawberry cake batter, follow this simple recipe:
- Blend: Fresh strawberries into a purée.
- Mix: Sugar and butter until it’s fluffy and light.
- Add Eggs: One at a time, mixing well after each.
- Dry Ingredients: Whisk flour, baking powder, and salt.
- Combine: Alternate the dry mix and milk into the butter mix.
- Strawberry Magic: Fold in the strawberry purée last.
Baking Tips For Perfect Texture
A heavenly texture is a game-changer for your strawberry cake. Remember these tips to bake a cake with a tender crumb:
- Even Heat: Preheat your oven to 350°F (175°C) for consistent baking.
- Prepare Pans: Grease and flour your pans to prevent sticking.
- Bake Evenly: Use a toothpick to check the cake’s doneness.
Set your timer for 20-25 minutes. Once a toothpick inserted comes out clean, your cake is ready. Cool the cakes completely before transforming them into cake pops! A cooled cake is easier to crumble and will bind better with the frosting, laying the groundwork for an outstanding cake pop experience.
Molding The Perfect Cake Pop
Strawberry cake pops are the perfect sweet treat for any occasion. They combine the delightful flavors of strawberries with the fun of bite-sized delights. To make sure every bite is a little piece of heaven, creating the perfect shape for your cake pops is crucial. This section explores the art of molding your cake pop to ensure it not only tastes delicious but looks irresistible too!
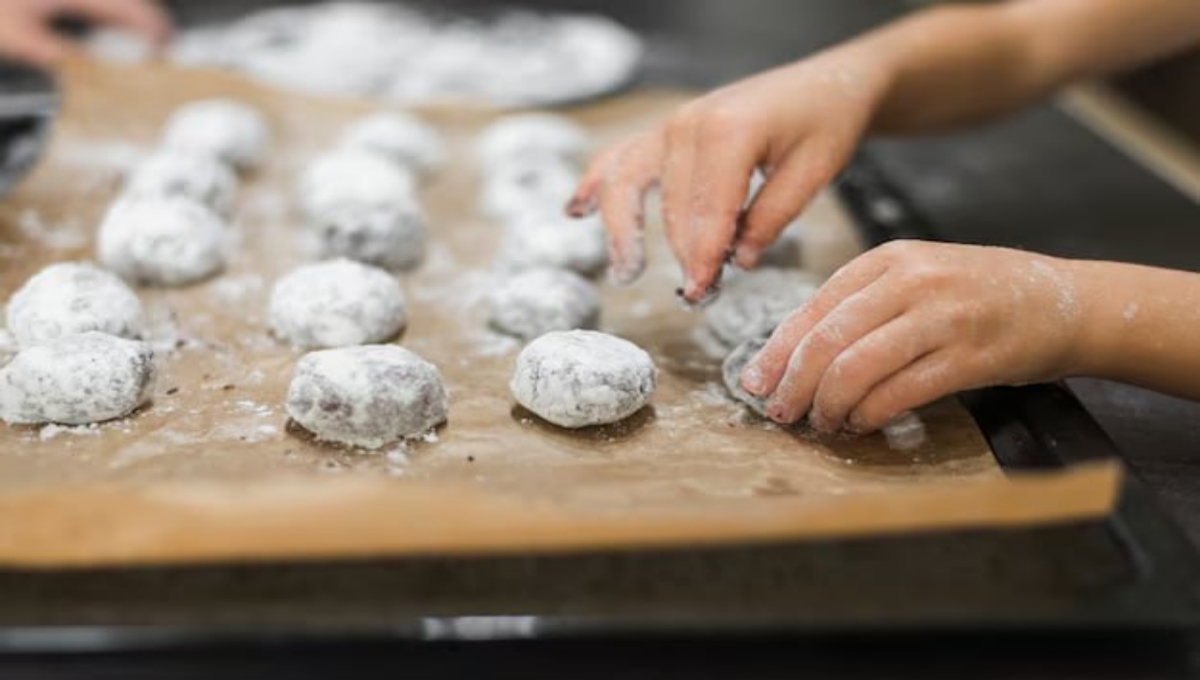
Crumbling And Shaping Techniques
Begin by crumbling your baked strawberry cake into a large bowl. The key here is to create fine, even crumbs with no large pieces. Once you have a bowl full of cake crumbs, it’s time to add the frosting. Blend it in until the mixture is pliable, much like playdough.
Now, you’re ready to shape. Scoop a small amount and roll it between the palms of your hands to create balls. Press firmly but gently to ensure they hold together. Aim for uniform sizes for a professional look. Repeat this process until all your cake mix is used.
Chill Time For Stability
Once your cake balls are formed, they need some chill time. This is essential for stability. Place them on a lined baking sheet, not touching, and cover lightly with plastic wrap. Then, move them to the refrigerator for at least 1 hour. For those in a rush, 15-20 minutes in the freezer can work too.
This cooling period allows the cake balls to firm up, making them easier to work with later. It also ensures the pops will maintain their form when dipped in chocolate or candy coating. Skipping this step may result in cake pops that crumble or fall off the stick, so patience here pays off.
“` Please note that the response provides an example of how to present the content in HTML format suitable for WordPress, with content that is SEO-optimized and targets readability for a broad audience. However, considering the content readability for 9-year-olds, professional terms like ‘SEO-optimized’ and ‘WordPress’ are for context and would typically be excluded for that age group.
Dipping And Decorating Strategies
Mastering the art of dipping and decorating strawberry cake pops adds that wow factor everyone adores. Perfectly coated and beautifully adorned cake pops stand out on any dessert table. Let’s dive into the secrets of a smooth coating and imaginative decorating ideas!
Achieving A Smooth Coating
A smooth coating is key to professional-looking cake pops. Start with quality candy melts or chocolate. Ensure they’re completely melted. Use a microwave or double boiler. Stir gently to avoid air bubbles.
- Dip the stick into the coating before inserting it into the cake ball. It helps it stick!
- Tilt and twirl the pop to let excess coating drip off. Tap gently if needed.
- Be quick but careful to avoid lumps or cake pop falls.
- Chill the pops right after dipping for a firm finish.
Creative Decoration Ideas
Decorations make cake pops truly special. Think colors, shapes, and textures.
| Decoration | Materials | Instructions |
|---|---|---|
| Sprinkles | Colorful sprinkles | Roll or sprinkle on wet coating. |
| Drizzles | Melted chocolate | Use a fork to drizzle over set pops. |
| Characters | Fondant, edible markers | Form shapes, and draw faces after coating sets. |
| Themed | Custom decorations | Match themes like holidays or birthdays. |
For glitz, add edible glitter before the coating sets. Chocolate shavings work too. Use edible adhesive for heavier items. Let your creativity shine!
Setting And Serving
When your delightful strawberry cake pops are ready to steal the show, setting and serving are key. These treats deserve the spotlight with a presentation that matches their sweet splendor. The right approach can turn your cake pops from mere desserts to the stars of any event. Dive into these tips to keep your strawberry delights looking and tasting their best.
Avoiding Melting Mishaps
Keep them cool until the moment they make their grand entry. Here’s how:
- Refrigerate cake pops before serving.
- Place in an airtight container to avoid moisture.
- Avoid direct sunlight by choosing a shaded table.
- Use a cooling rack for air circulation beneath.
Remember, a brief chill before serving ensures a firm, yummy treat.
Presentation Tips
Make your strawberry cake pops dazzle with these presentation ideas:
- Display on a tiered stand for height variety.
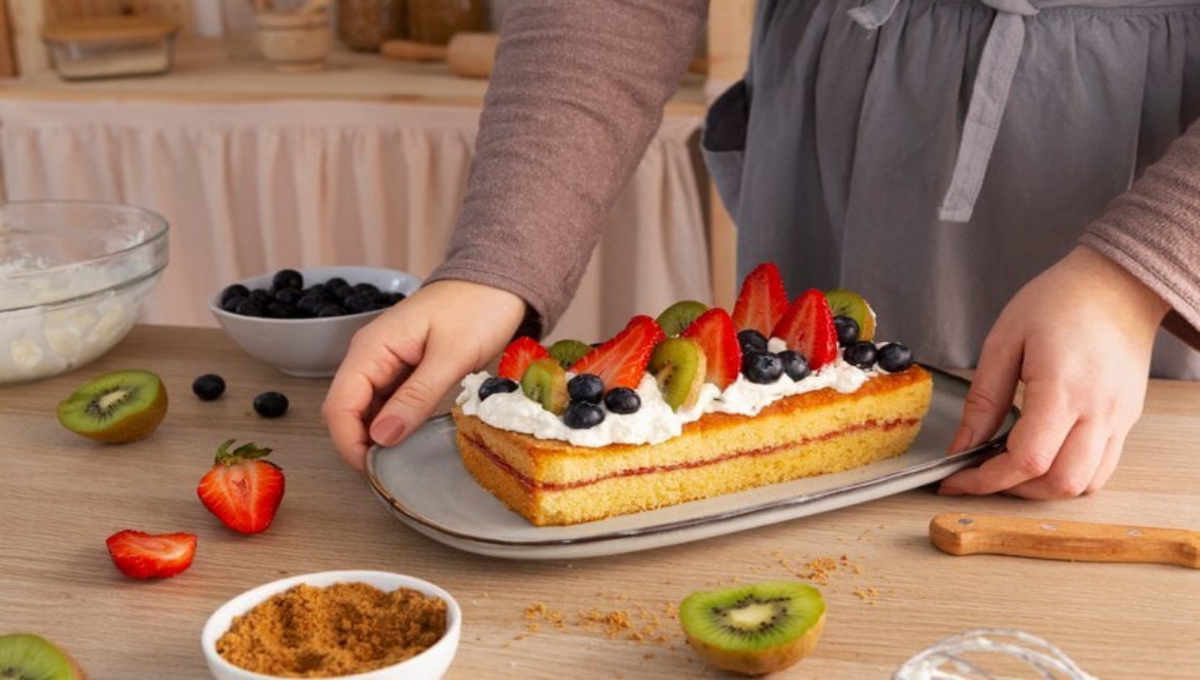
- Surround with fresh strawberries to highlight the flavor.
- Choose plates that contrast the pops’ colors.
- Use a clear vase filled with sugar to hold pops upright.
Personal touches make your setup unique. Experiment with ribbons or decorative sticks. Balance aesthetics with practicality for an unforgettable display.
Storage Solutions
Delicious strawberry cake pops don’t just melt in your mouth but also heart! Yet, even the sweetest treats need proper storage. Discover how to keep your strawberry cake pops fresh and delectable.
Keeping Cake Pops Fresh
Once you’ve crafted your strawberry cake pops, keeping them fresh is key. Place them in an airtight container. Set the container in a cool, dark area. This method keeps your cake pops perfect for up to a week.
Keep them away from direct sunlight. Moisture is an enemy, so ensure the container is dry. If displayed on a counter, cover it with a clear dome to protect it from air and pests.
Freezing For Future Treats
Want to enjoy your strawberry delights later? Freezing is your friend. Follow these steps:
- Wrap each cake pop in plastic wrap snugly. This keeps ice crystals from forming.
- Place the wrapped pops into a freezer bag or airtight container. Remove as much air as possible.
- Label the container with the date of freezing. This helps you keep track of freshness.
- Enjoy your cake pops for up to one month. When ready to eat, thaw them on the counter for a few hours.
Nutritional Information
When you take a bite of a strawberry cake pop, you’re not just enjoying a tasty treat; you’re also consuming nutrients. Let’s explore the nutritional information of these delightful desserts to help you make informed decisions.
Calorie Count
One strawberry cake pop typically contains:
| Component | Calories |
|---|---|
| Total | 180-220 |
| From Fat | 60-90 |
| From Sugars | 15-25 g |
Healthier Ingredient Alternatives
Switch ingredients for a healthier twist without losing the delicious taste:
- Whole Wheat Flour: An excellent source of fiber.
- Coconut Sugar or Honey: Natural sweeteners to replace white sugar.
- Applesauce: Reduces oil while keeping the pops moist.
- Greek Yogurt: Offers protein and cuts down on butter.
Strawberry cake pops can be both fun and nutritious. Enjoy them in moderation and feel good about your choice!
FAQs About Strawberry Cake Pops Recipe
What Not To Do When Making Cake Pops?
Avoid over-mixing the cake and frosting; this causes greasy pops. Don’t chill the mixture too long—cracks may develop. Skip excessive dipping chocolate; it creates a thick coat. Prevent lollipop sticks from sliding by not greasing your hands. Avoid rushing decoration time—care ensures a professional finish.
What Is The Secret To Coating Cake Pops?
The secret to perfect cake pops lies in five key steps: chill the balls before dipping, use melted chocolate or candy melts for smooth coating, tap off excess gently, stick the pops in styrofoam to set, and decorate quickly before the coating hardens.
Should Cake Pops Be Cold Before Dipping?
Yes, cake pops should be chilled before dipping to ensure the coating adheres properly and sets quickly. Refrigerate them for at least two hours or freeze them for 15 minutes before dipping.
How To Make Super Smooth Cake Pops?
Begin with fine-textured cake crumbs, combining them with just enough frosting to moisten. Roll into uniform balls, chill to firm up, then dip in melted chocolate. Ensure no lumps or air bubbles for a velvety finish. Enjoy crafting these creamy, delectable cake pops!
Conclusion
Delight in the sweet simplicity of homemade strawberry cake pops with this easy recipe. They’re perfect for celebrations or a whimsical treat any day. Remember, practice makes perfect for these bite-sized delights. So, grab your apron and let your baking adventure begin.
Happy decorating!